With macOS 10.15.5 out, it was time to update my Hackintosh again. This does take a bit more preparation than updating genuine Mac hardware. Since a few folks on Twitter were curious, here’s how this works.
Background
Earlier this year, I built myself a Hackintosh, similar to this setup (picture porn here). I still work 95 percent of my time on my 16-inch MacBook Pro, but it’s convenient to have a really powerful machine to compile large projects (like Swift). I’m impressed with the overall stability — I had considerably fewer kernel panics here than with my MacBook Pro, and I’m using the LG 5K in full resolution on the Hackintosh, thanks to the Gigabyte GC-Titan Ridge.
To run macOS on non-Apple hardware, you need a bootloader. I chose OpenCore, as it’s fast, modern, and open source. Legacy setups might still use Clover, but OpenCore is much better on a long-term basis, and you don’t have to disable security features such as SIP. If you’re curious about building a Hackintosh, check out the OpenCore Vanilla Guide.
Bootable USB Drive
Before updating macOS, you want to update OpenCore and the needed kexts. You can do this on your machine directly, but it might not boot anymore if you make a mistake. It’s better to first test drive the new boot loader on a removable drive:
- Get a USB drive and GUID format it to HFS+ Journaled.
- Mount both your boot disk EFI and your USB drive EFI partitions via MountEFI.
- Copy the
EFIfolder from your boot drive EFI partition to your USB drive EFI partition.
(I know, so much EFI!) - Reboot and select the USB drive as the source in your BIOS to verify that you can boot from the disk.
Updating OpenCore
Did it work? Great, now it’s time to update OpenCore! There’s a monthly release cycle not only for OpenCore but also the core kexts, so it’s smart to wait a few days to update.
- Get the latest OpenCore release. I cheated a bit and got myself a nightly build of 0.5.9-pre, since the release is just a few days away and it seemed worth the risk.
- Replace
EFI/BOOT/BOOTx64.efi,EFI/OC/OpenCore.efi, andEFI/OC/Drivers/OpenRuntime.
If you’ve never done this before, I recommend reading Updating OpenCore and macOS, which explains the steps in far more detail.
Updating config.plist
Now the fun part starts! OpenCore is configured with one giant config.plist and is really picky about it. You want to be sure to get this right, and keep in mind the format changes slightly with every release.
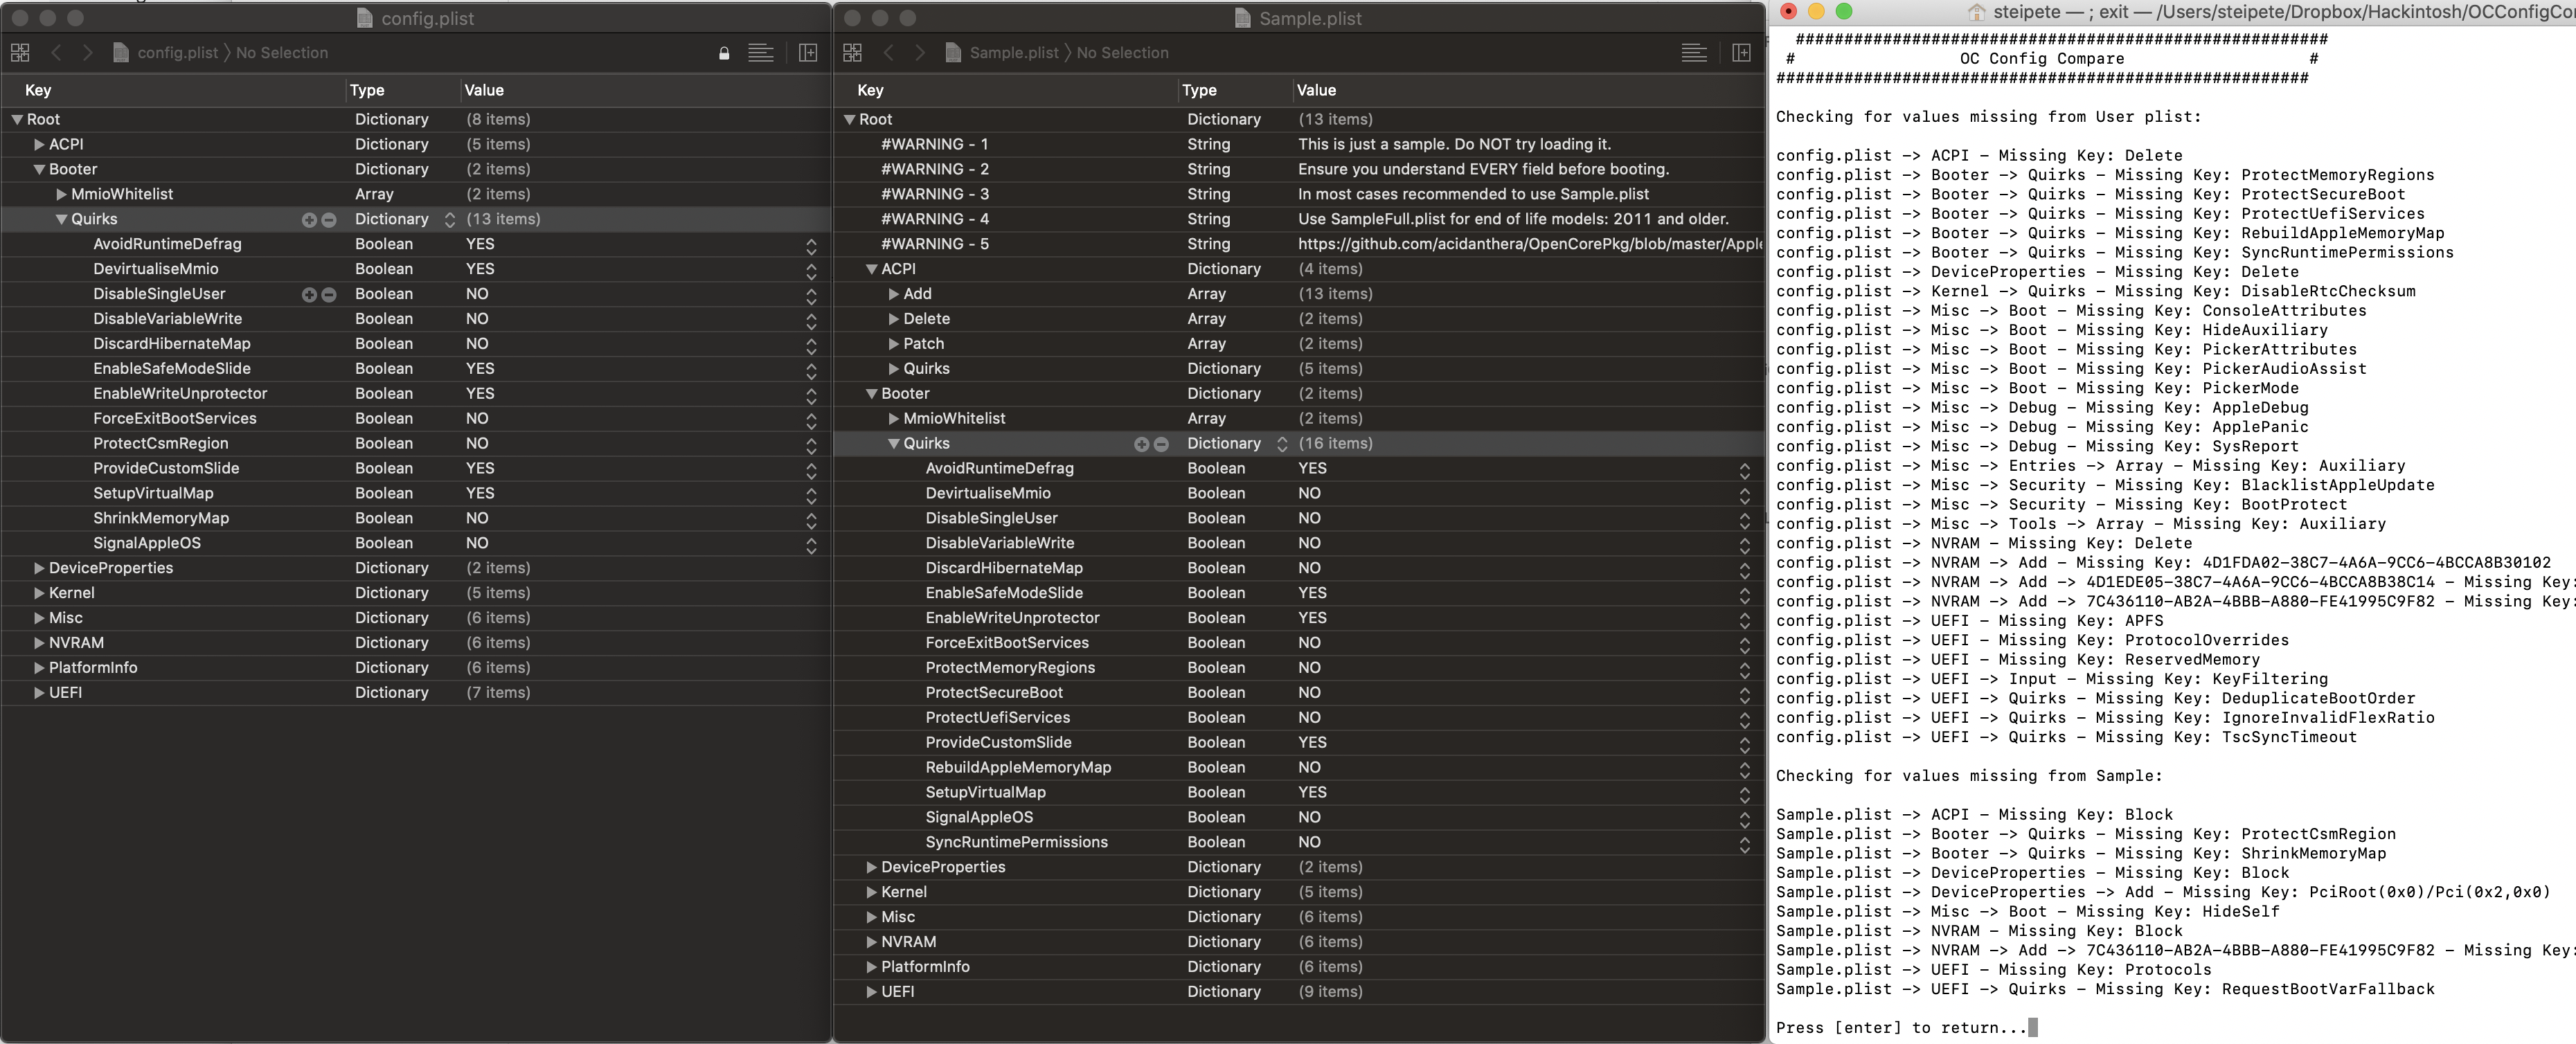
Use OCConfigCompare to compare between the sample.plist and your config.plist The script has an auto-download feature, but since I used a nightly here, I set a manual folder.
Use Xcode to edit the plist files, and be meticulous. Don’t forget that your configuration contains different settings, so be on the lookout for if a key has to simply be renamed and migrate your values.
Done? Good. Upload the file here for a quick check and go back and fix the parts you missed. :)
Updating Kexts
You will have a variety of kexts to support your Hackintosh hardware. Here are mine:
Update as needed, and then boot from the updated EFI on your USB drive. If everything works, copy the new EFI folder back to your boot drive EFI partition. You can unplug the drive now, as it’s no longer needed.
Update Drivers & Tools
OpenCore also comes with EFI drivers and tools, and you can see if there’s anything new or interesting. Make sure to delete outdated drivers. I updated from 0.5.6 to 0.5.9, so a few drivers were merged into OpenRuntime.
I used VBoxHfs-64.efi and replaced it with HFSPlus.efi. The former is the HFS+ driver from VirtualBox, while the latter is Apple’s original driver, which is supposedly faster.
Update Time 🥁
Now it’s time to update! I don’t use my Hackintosh as my primary system, and I do not recommend doing so, but if you do, please make a backup (I recommend SuperDuper! and Arq).
There’s no guarantee your system will come back up again, however, it did in my case, and the whole update procedure — including writing this post — took me about 1.5 hours. Not too bad, eh?
Update: Big Sur Beta 10
Big Sur required a few OpenCore updates over the beta period, and at some point it wouldn’t download the updater anymore. I worked around this by downloading the full Big Sur updater on Catalina and running it manually.
You need to disable Apple Secure Boot to make it work: Misc -> Security -> SecureBootModel -> Disabled
Currently running OpenCore 0.6.3pre from Oct 27, 2020 and everything is running great.